Macro Keyboard with an Arduino Pro Micro (ATMEGA 32u4)
A hot-key, shortcut, or macro keyboard built with an Arduino Pro Micro. This macro pad has as many features as it does mistakes during the design process. I wanted to make a macro keyboard to improve my workflow with some CAD programs. I added some of my favorite ideas from other's creations, like two rotary encoders, a mode switch, and a breakout to use a foot-petal for discrete keyboard stealthiness. UPDATED VERSION (V2.1) is here!

Code: bare bones
Requires keyboard.h and keypad.h libraries.
switchcase_macrokeysv0.3.zip
Compressed archive in ZIP format [3.1 KB]
Code: YouTube video
switchcase_macrokeys_Video_example.zip
Compressed archive in ZIP format [3.6 KB]
Troubleshooting + Helpful Tips!
Some basic trouble shooting:
- This PCB is not plug-and-play. You have to write at least the example code linked from this product description. Codes is on this page.
- Use the Arduino IDE to program. (see arduino.cc for help with adding libraries and getting the software to program the Arduino).
- Make sure you have these libraries added:
#include <Keyboard.h>
#include <Encoder.h> see below for details on this.
#include <Keypad.h>

...You might be missing the <encoder.h> library.
Go to Tools>Manage Libraries.
Search for “rotary encoder”. When you find the library listed below, install it.
4. Make sure the Arduino Micro 32u4 is selected when programming this board. Tools> Board> Arduino Micro.

2) Make sure you have the Arduino Pro Micro selected. Tools> Board> Arduino Micro
5. Make sure all the solder jumpers are soldered! You’ll get really weird results (phantom keys) if you miss a jumper.
6. You may have to hold down the reset button, hit upload sketch, wait for the IDE to try to ‘upload’ to the Arduino, then release the reset button.
The boot-loader for uploading is a short window in the Arduino Pro Micro. The Pro Micro wants to default to the USB HID mode. Catching the short window for uploading a program might take a few tries;
i.e to get a feel for the timing (my experience).
CODE [writing your own macros] Helpful Tips!
/
Ryan's Pro Tips for navigating the <keyboard.h> and <mouse.h> HID library commands.
=============== Keyboard Control================================================================================
Keyboard.write(); Sends a keystroke to a connected computer.
This is similar to pressing and releasing a key on your keyboard.
Will send a shift command if applicable. Example: Keyboard.write('K') will automatically do SHIFT + k.
Can also accept ASCII code like this:
//Keyboard.write(32); // This is space bar (in decimal)
Helpful list of ASCII + decimal keys: http://www.asciitable.com/
Keyboard.press(); Best for holding down a key with multi-key commands; like copy/ paste
This example is [ctrl] + [shift] + [e]
//Keyboard.press(KEY_LEFT_CTRL);
//Keyboard.press(KEY_LEFT_SHIFT);
//Keyboard.press('e');
//delay(100); Keyboard.releaseAll();
Keyboard.print(); Sends a keystroke(s)
Keyboard.print("stop using aim bot"); // types this in as a string
Keyboard.println(); Sends a keystroke followed by a newline (carriage return)
Very practical if you want to type a password and login in one button press!
SOMETIMES, applications are coded to recognize Keyboard.press() and not Keyboard.write() and vice versa.
You might have to experiment.
=============== Mouse Control================================================================================
Mouse.move(x, y, wheel); Moves the mouse and or scroll wheel up/down left/right.
Range is -128 to +127. units are pixels
-number = left or down
+number = right or up
Mouse.press(b); Presses the mouse button (still need to call release). Replace "b" with:
MOUSE_LEFT //Left Mouse button
MOUSE_RIGHT //Right Mouse button
MOUSE_MIDDLE //Middle mouse button
MOUSE_ALL //All three mouse buttons
Mouse.release(b); Releases the mouse button.
Mouse.click(b); A quick press and release.
*******************************************************************/
Paper Template:
MacroKeyboard Key Template Layout.pdf
Adobe Acrobat document [49.4 KB]
STL files (3D print) Stand + Soldering Jig for Cherry Switches:
Compressed archive in ZIP format [36.3 KB]
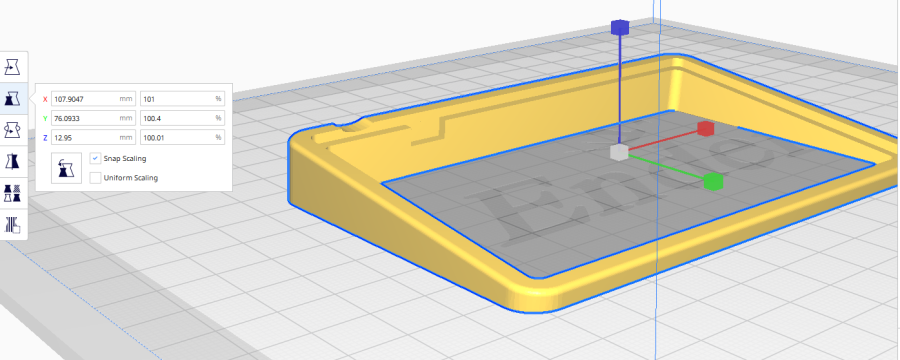
Scale STL to compensate for part shrinkage (PLA) :
X= 101%
Y= 100.4%
Z= 100% (no change)
I print on Ender3 Pro
Infill: 30%
Layer height: 0.28mm (Low quality)
Filament: Hatchbox PLA
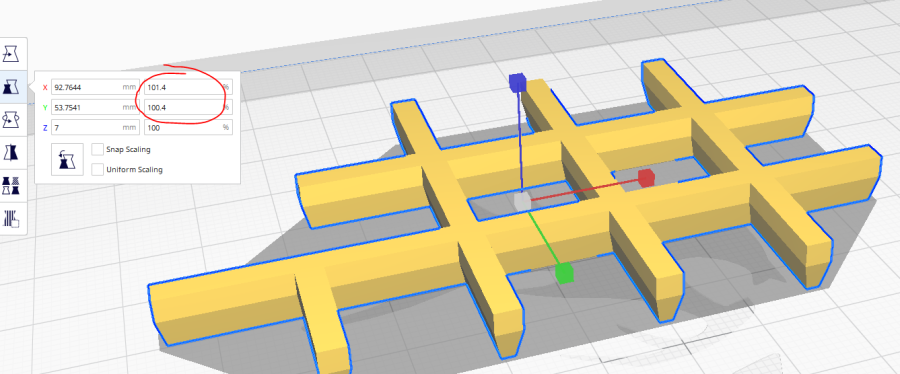
Scale STL to compensate for part shrinkage (PLA) :
X= 101.4%
Y= 100.4%
Z= 100% (no change)
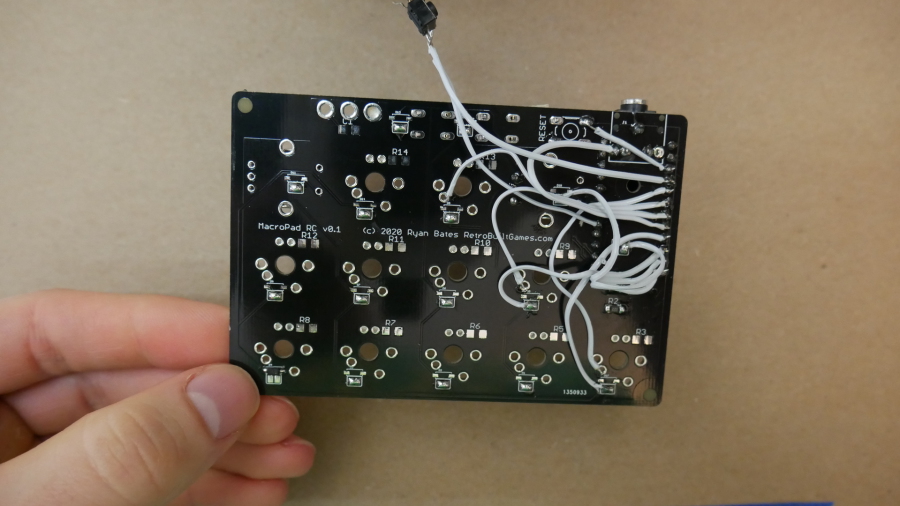 I kid you not, I forgot to label my nets on two PCB orders. I have been humbled.
© 2013-2023 Ryan Bates and © 2013-2023 Retro Built Games, LLC. All photos, designs, documents, and graphics (C) Ryan Bates. All Rights Reserved.
This site is best viewed on a desktop PC. Raspberry Pi is a trademark of the Raspberry Pi Foundation. ARDUINO® and other Arduino brands and logos published in the website are Trademarks of Arduino AG.