Mapping for GPIO Arcade Buttons
Background
If you are wiring arcade controls directly to the Raspberry Pi's GPIOs, you must have extra software installed to make this work (and protect the pi).
I use Adafruit's Retrogame to do this. If installing Retrogame in a vanilla Retropie image be sure to follow Adafruit's Retrogame tutorial. Everything is explained there in great detail even for beginers. I just touch on some topics quickly.

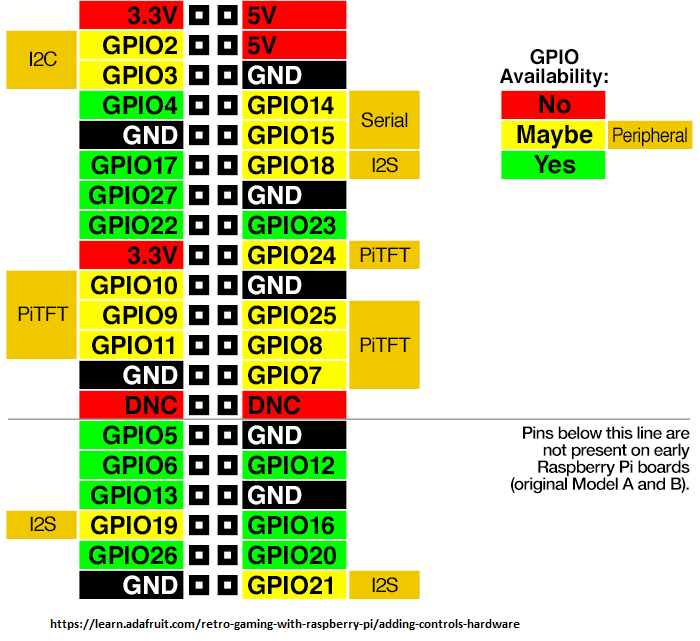
The Pi 1 B+,2,3,3B+ have a set number of GPIO for inputs or peripherals. Dedicated versus reserved GPIOs are shown to the left. If you are wiring to GPIOs for a full 2-player setup you have to use every available pin. Any hardware that you are using with the Pi via I2C or other serial connection may not function as the retrogame configuration will supercede the GPIO's function with it's keyboard encoding.
Porta Pi Custom GPIO Mapping
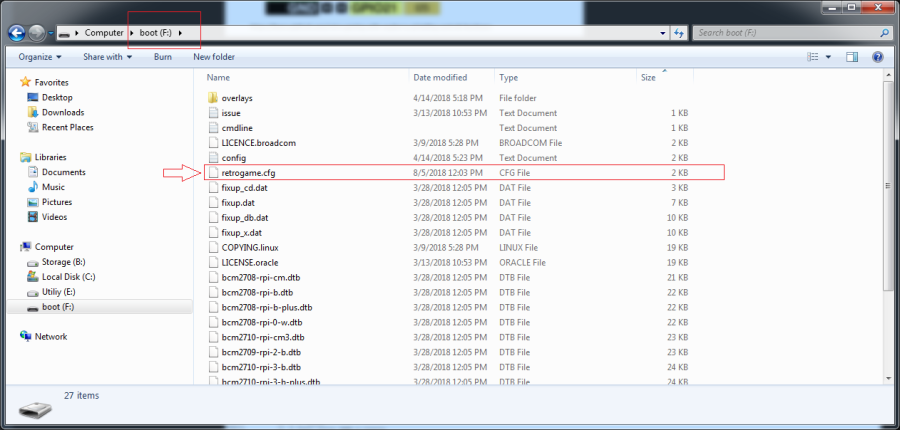
The newest Retropie image I host on the website has retrogame installed and configured for two player (with 6 buttons per player). If you follow the above tutorial you can find the keyboard-to-GPIO mapping config file I wrote. Once Adafruit's Retrogame is installed to your SD card you can edit this file in Windows. This file is stored on the /boot parition of the image.
It looks like this (use notepadd++ or similar):
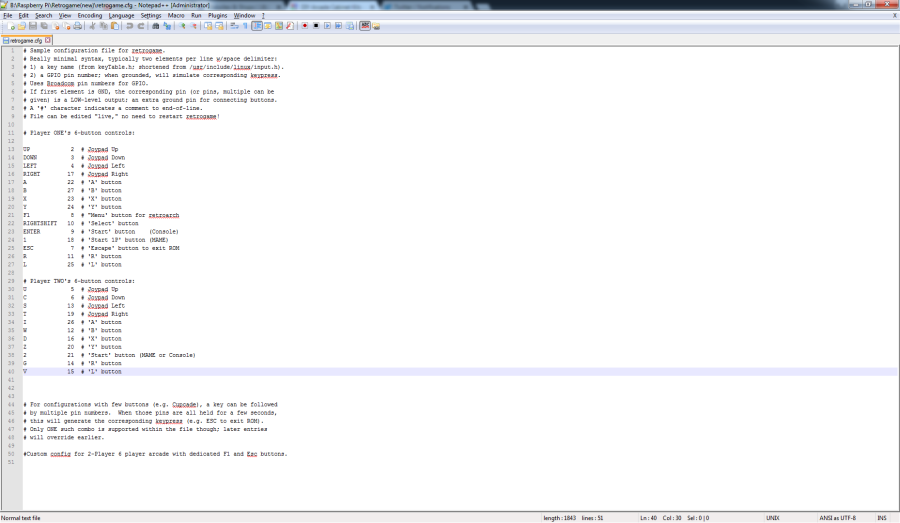
Compressed file archive [1008 Bytes]
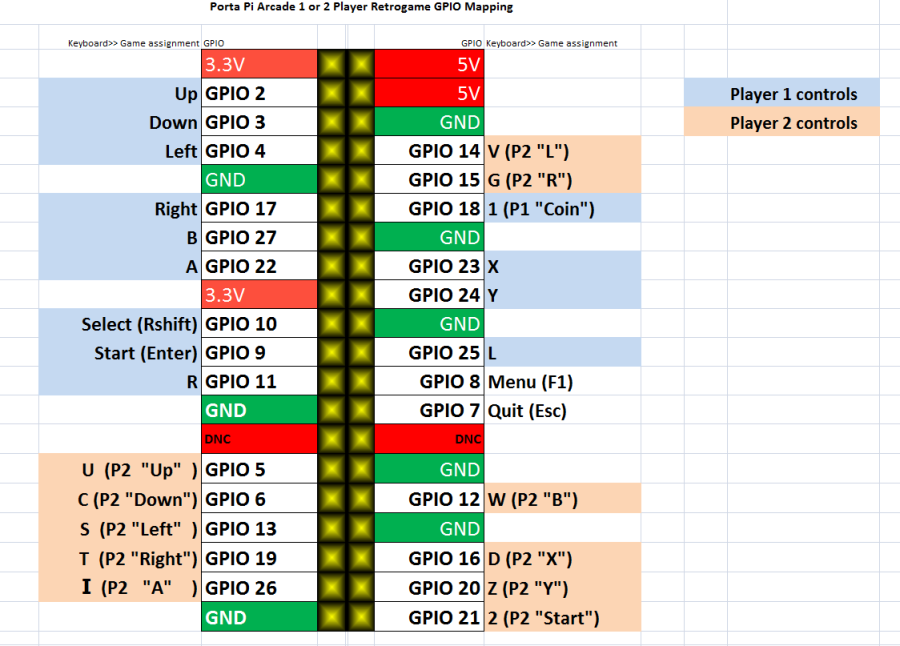
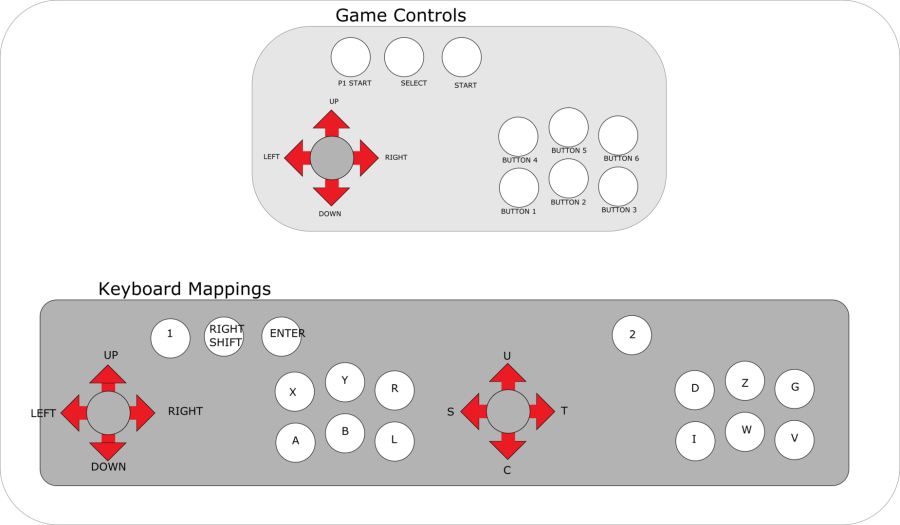
The layout is summarized like so:
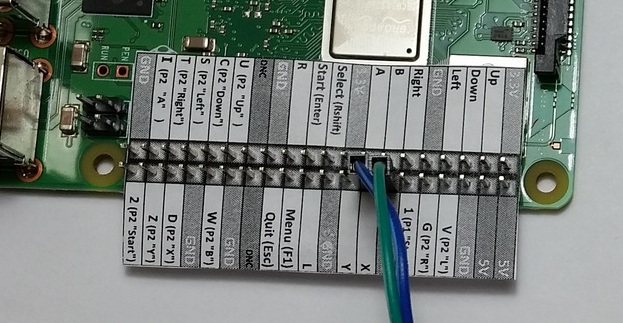
GPIO Cheat sheet can be downloaded below. Print with scaling OFF.
Another way to look at it:
© 2013-2023 Ryan Bates and © 2013-2023 Retro Built Games, LLC. All photos, designs, documents, and graphics (C) Ryan Bates. All Rights Reserved.
This site is best viewed on a desktop PC. Raspberry Pi is a trademark of the Raspberry Pi Foundation. ARDUINO® and other Arduino brands and logos published in the website are Trademarks of Arduino AG.